一、环境
推荐VPS:Vultr.com
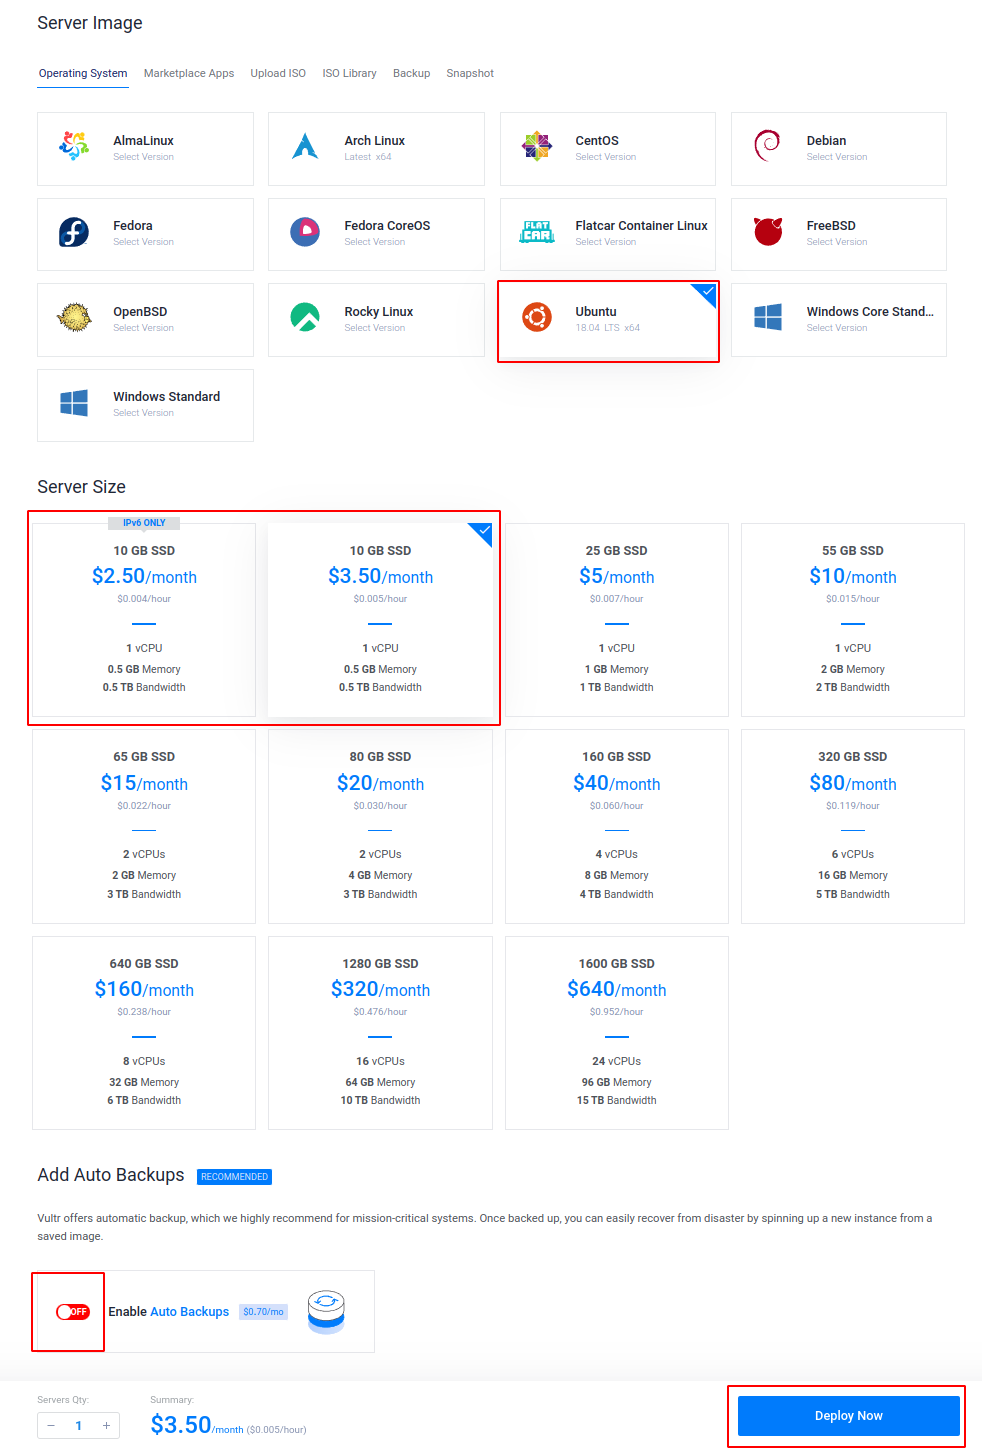
套餐选择如下:


VPS安装
CentOS 6和7/Debian6+/Ubuntu14+ ShadowsocksR/Shadowsocks一键部署管理脚本:
1. SSR
# Linux
apt-get -y install wget

wget -N --no-check-certificate https://raw.githubusercontent.com/ToyoDAdoubi/doubi/master/ssr.sh && chmod +x ssr.sh && bash ssr.sh
参数设置如下:
(1)加密方式:none 协议:origin 混淆:tls1.2_ticket_auth
(2)加密方式:none 协议:auth_chain_a 混淆:tls1.2_ticket_auth
2. SS/SSR安装
(1)ubuntu 18.04 -
# Linux SSR
wget -N --no-check-certificate https://raw.githubusercontent.com/ToyoDAdoubi/doubi/master/ssr.sh && chmod +x ssr.sh && bash ssr.sh
(2) ubuntu 20.04+
# 设置python版本
sudo update-alternatives --install /usr/bin/python python /usr/bin/python2.7 1
sudo update-alternatives --install /usr/bin/python python /usr/bin/python3.8 2

# 选择python版本(选择python2 作为默认python版本)
sudo update-alternatives --config python

# 安装wget
apt-get -y install wget

# 安装SSR
wget -N --no-check-certificate https://raw.githubusercontent.com/ToyoDAdoubi/doubi/master/ssr.sh && chmod +x ssr.sh && bash ssr.sh
二、设置域名
注册域名或者转移域名
在cloudflare上面注册域名或者将域名转移到cloudflare里。
设置SSL/TLS
在
SSL/TLS–>概述中设置SSL/TLS模式为完全

在
SSL/TLS–>边缘证书中始终使用 HTTPS为关闭

在
DNS–>记录中添加记录:类型为A;名称自定义(二级域名);内容为云服务器ip;关闭代理状态:

其中二级域名为名称加上原来域名,类似图中的test.aigrantli.com
三、配置x-ui
安装x-ui
以下命令行二选一(推荐gitlab):
# github
wget -N https://raw.githubusercontent.com/GJXS1980/x-ui/main/install.sh && bash install.sh

# gitlab
wget -N https://gitlab.com/rwkgyg/x-ui-yg/raw/main/install.sh && bash install.sh
按照提示来设置用户名、密码、端口。
配置x-ui
登录x-ui,访问地址为:
ip:port输入用户名、密码登录x-ui

在
入站列表–>添加入站

编辑入站信息,其中端口可以选择:
2052、2082、2086、2095、80、8080、8880;传输选择ws;tls必须关闭;增加请求头,其中二级域名为设置域名

将全部的
yg kkk(3个)改成openai.com

保存配置,然后重启面板

在
入站列表–>操作,点击二维码,然后复制二维码即为v2ray账号链接

四、WARP
安装warp
以下命令行二选一(推荐gitlab):
# github
wget -N https://raw.githubusercontent.com/GJXS1980/CFwarp/main/CFwarp.sh && bash CFwarp.sh

# gitlab
wget -N https://gitlab.com/rwkgyg/CFwarp/raw/main/CFwarp.sh && bash CFwarp.sh

配置

方案一:warp脚本选1,安装成功后,可设v4与v6分流!有v6的话,在配置文件处默认ip6下的yg kkk替换为openai.com,保存重启
方案二:warp脚本选2,安装成功后,在配置文件处的socks5-warp下的yg kkk替换为openai.com,保存重启
方案三:在配置文件的xray-wg-warp下把yg kkk替换成openai.com,保存重启
查询ip看看是否ip已经伪装
查询ip
多平台优选WARP对端IP脚本
以下命令行二选一(推荐gitlab):
# github
curl -sSL https://raw.githubusercontent.com/GJXS1980/CFwarp/main/point/endip.sh -o endip.sh && chmod +x endip.sh && ./endip.sh

# gitlab
curl -sSL https://gitlab.com/rwkgyg/CFwarp/raw/main/point/endip.sh -o endip.sh && chmod +x endip.sh && ./endip.sh

五、应用
Qv2ray软件配置
这里使用Qv2ray-v2.7.0-linux-x64.AppImage操作:
- 将配置x-ui生成的二维码链接导入到软件


启动

浏览器开系统代理即可


评论区